
![]()
![]()
![]()

Automatically Redirect HTTP requests to HTTPS on IIS 7 |
Apr
08
|
| « Moving an SSL certificate from Windows 2003 Server to Windows Server 2008 | Error when opening an EXE file » |
Series: Redirecting HTTP to HTTPS
- Automatically Redirect HTTP requests to HTTPS on IIS 7
- Automatically Redirect HTTP requests to HTTPS on IIS 6
- Automatically Redirect HTTP requests to HTTPS using ASP
- Automatically Redirect HTTP requests to HTTPS on IIS 7 using URL Rewrite 2.0
Please Note: This does NOT work on IIS 7.5 or R2. You will get a LOCK VIOLATION due to changes in security in the newer version. Please use the URL Rewrite 2.0 method instead.
This article is for IIS 7 for IIS 6 configuration please refer to this article.
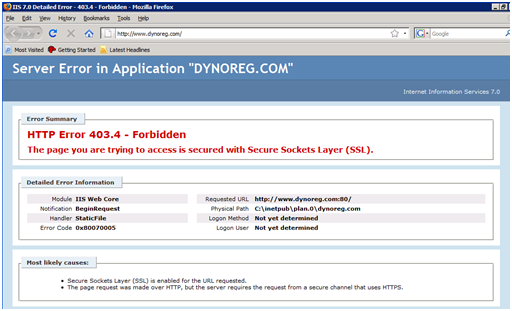
If you configure IIS to only allow https connections, a user will get a 403.4 error when attempting to access the page via http. To fix this problem we create a custom 403.4 page that redirects http requests to https. We will be changing this configuration in a couple of steps:
Step 1 – Verify SSL is required for the selected site
Step 2 – Create a HttpRedirect.htm file and save it to C:\InetPub
Step 3 – Set the 403.4 error page to use this file instead of the regular error file
Step 4 – Test
This is a standard 403.4 error message file provided out of the box with IIS 7.
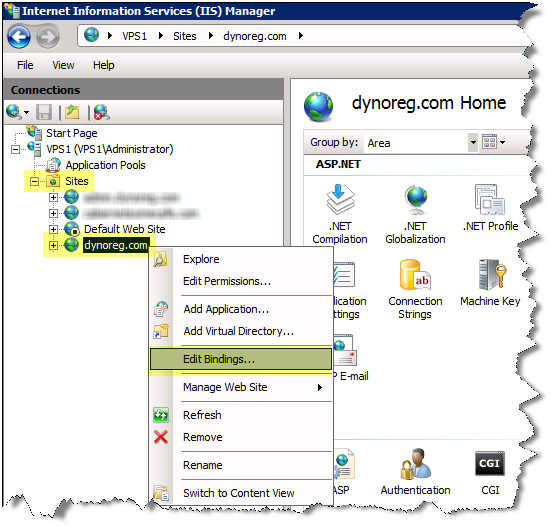
Step 1 – Verify SSL is required for the site
- Right click the web site
- Select “Edit BindingsÔò¼├┤Ôö£├ºÔö¼┬¼”
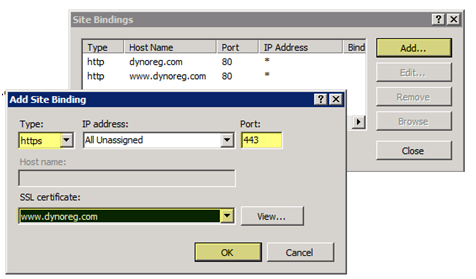
- Select “AddÔò¼├┤Ôö£├ºÔö¼┬¼”
- Select the “Type” as “https”
- Select “IP Address” as “All Unassigned”. NOTE: You can assign multiple SSL Certificate to a server as long as each SSL certificate is using a DIFFERENT IP ADDRESS because only one IP Address can bind the 443 port at a time with IIS
- Select the “SSL certificate”, select the SSL certificate that you have imported for this website
- Press OK to continue
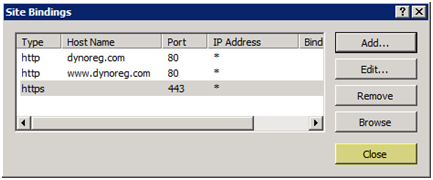
You should see the binding for “https” on the list of bindings now
- Press “Close” to continue
We can stop the configuration here if we wanted users to access the site via http OR https, I want to force users to use https so we will make the next configuration change
- Under the “Features View”, double click “SSL Settings”

- Check “Require SSL” and press “Apply”

Step 2 – Create a HttpRedirect.htm file and save it to C:\InetPub
We will be creating an HTM file containing the following code. We will save this file to C:\Inetpub.
1)””””” Open Notepad and copy in the following code below
2)””””” Go to File > Save as and save this file as HttpRedirect.htm, and save the file to C:\Inetpub directory.
You can download a copy of this file here: HttpRedirect.zip
<!-- beginning of HttpRedirect.htm file -->

<script type="text/javascript">

function redirectToHttps()

{

var httpURL = window.location.hostname+window.location.pathname;

var httpsURL = "https://" + httpURL ;

window.location = httpsURL ;

}

redirectToHttps();

</script>

<!-- end of HttpRedirect.htm file -->
Step 3 – Set the 403 error page to use this file instead of the regular error file
You can do this at the SERVER or SITE level. If you perform this action at the SERVER level it will be effective for all sites on the server and if you perform this action at the site level it will only be applicable to that website
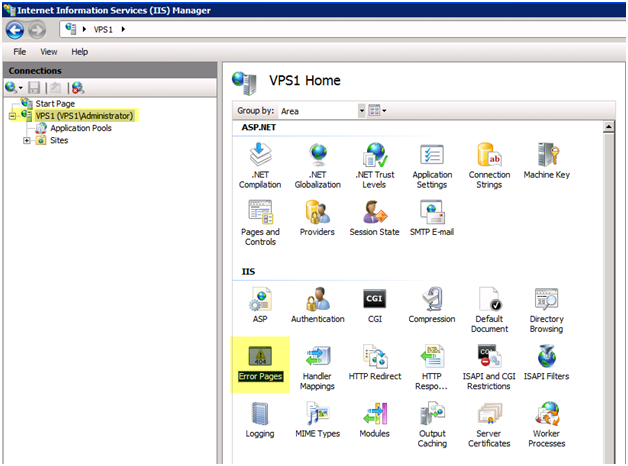
- Select the server name on the left side under “Connections”
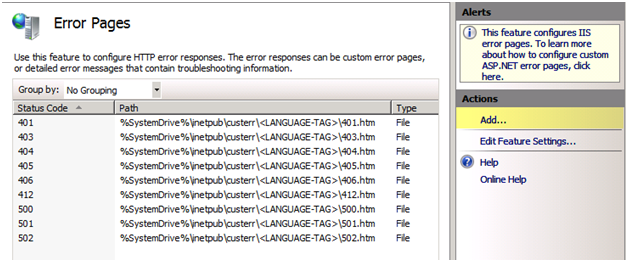
- Under the “features view” on the right side, double click “Error Pages”
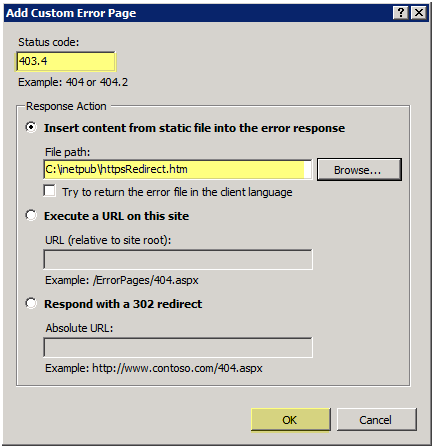
- Select “AddÔò¼├┤Ôö£├ºÔö¼┬¼”
- Set the status code as “403.4”
- Set the file to “C:\Inetpub\httpsRedirect.htm”
- Press “OK”
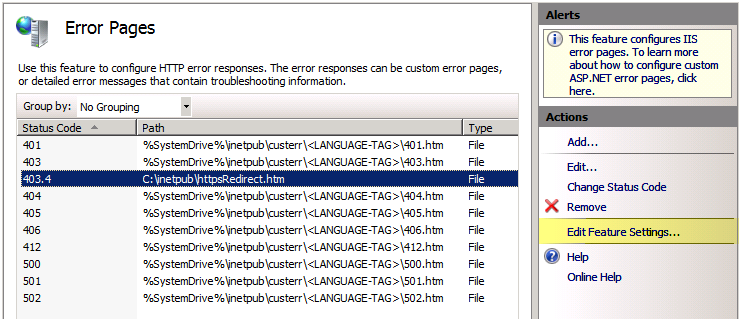
- You should now see the 403.4 error listed with the other error codes
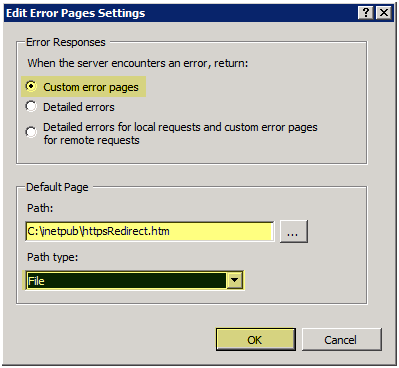
- Select the error code and press “Edit Feature SettingsÔò¼├┤Ôö£├ºÔö¼┬¼”
- Change to “Custom error pages”
- Change the path of the page to “C:\Inetpub\httpsRedirect.htm”
- Change the path type to “file”
- Press OK
Step 4 – Testing the website
- To test go to HTTPS https://www.sitename.com, you should go to the site with no problems.
- If you go to HTTP http://www.sitename.com you should not get a 403.4 error. It should redirect to HTTPS
| NoteIn the unlikely event that a client does not have JavaScript enabled, this will not work. JavaScript must be enabled on the client machine for this to work. |