
![]()
![]()
![]()

Install and Configure Active Directory Domain Services (ADDS) Role on Windows Server 2012 |
Sep
30
|
| « How to show the My Computer icon on Windows Server 2012 Desktop | SharePoint 2013 Installation on Windows Server 2012 » |
“
Install Active Directory Domain Services (ADDS) Role
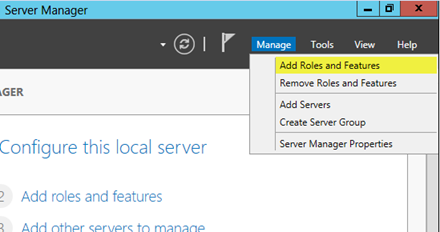
Launch Server Manager
Click Add Roles and Features
“
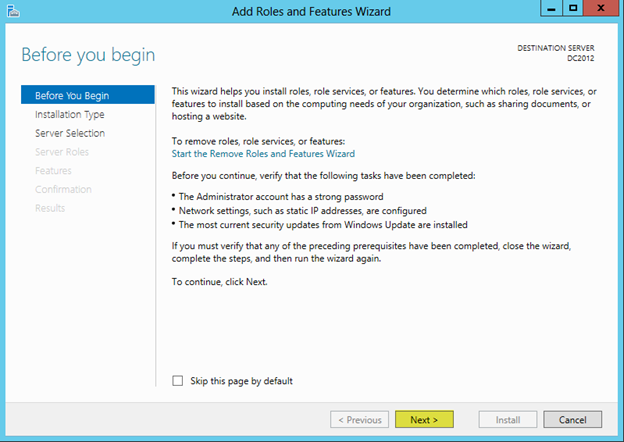
Click Next
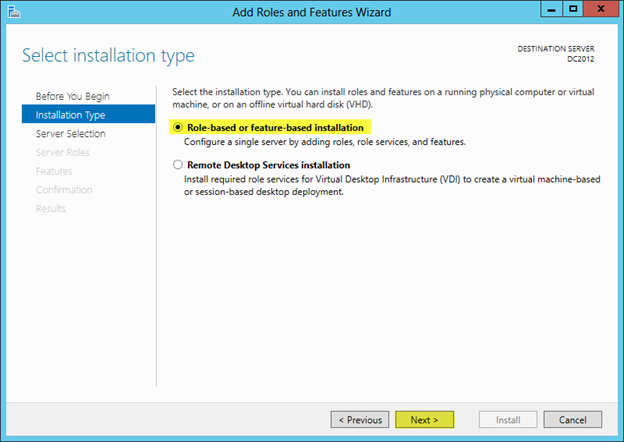
Select Role-based or feature-based installation and press Next
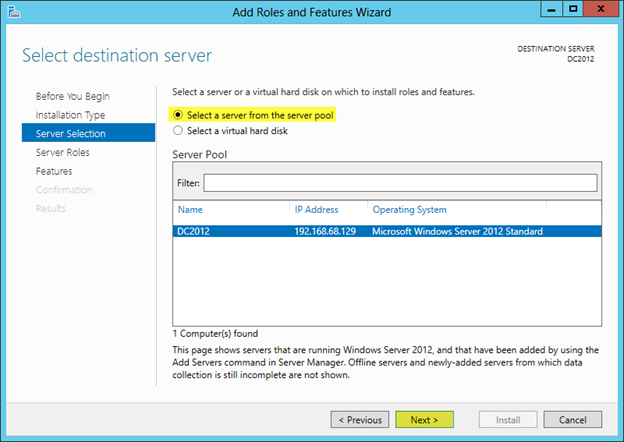
Since I am installing my forest locally I will select “Select a server from the server pool”
Select the server, in my case its DC2012
Press Next
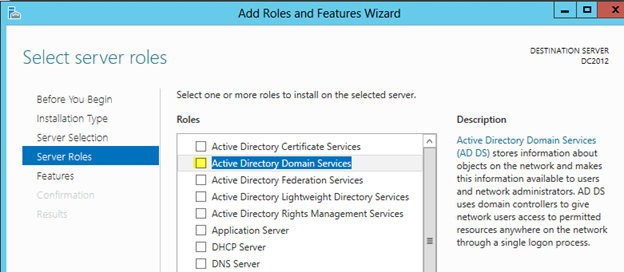
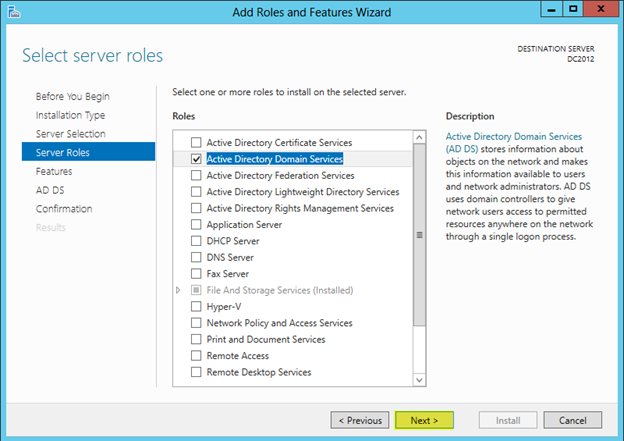
Check off Active Directory Domain Services
“
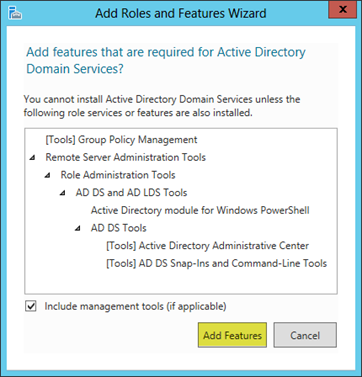
When you check off Active Directory Domain Services a dialog window will pop up
Press Add Features
Press Next
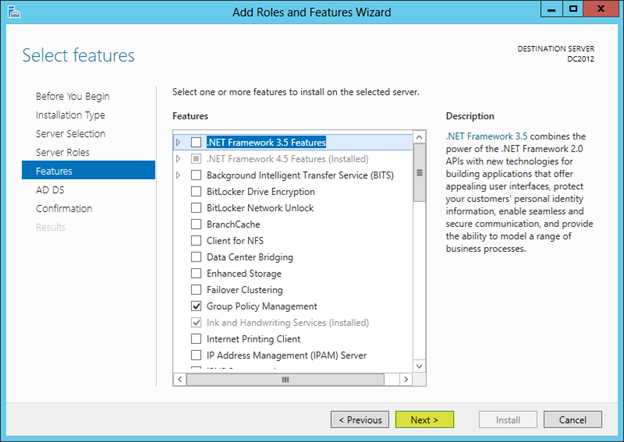
Press Next on the features section, you do not need to check anything off here.
Some things will be checked off because you selected Active Directory Domain Services in the last section.
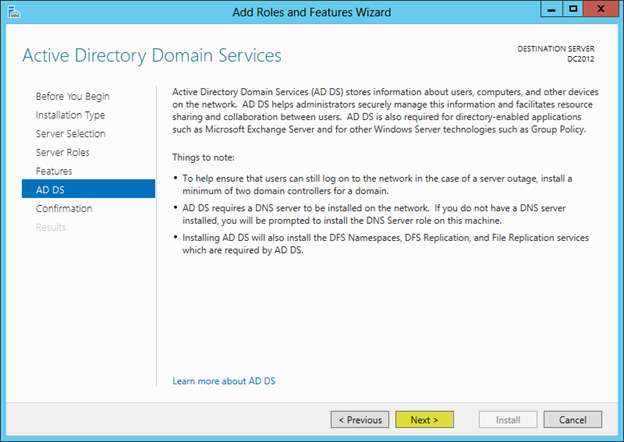
Read the important things to note about this installation.
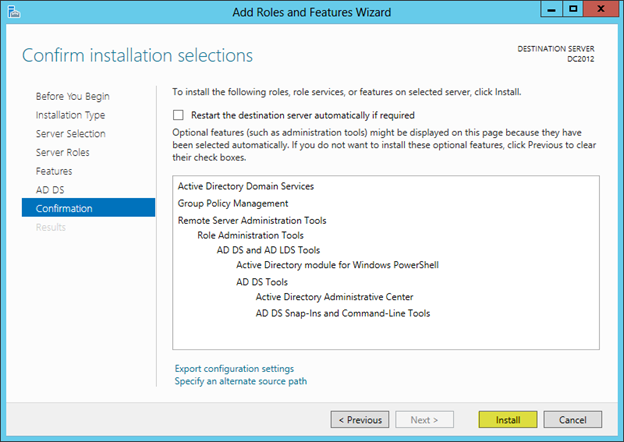
Press Next
Press Install
Installation will complete. Press Close

Configure ADDS Forest and Domain
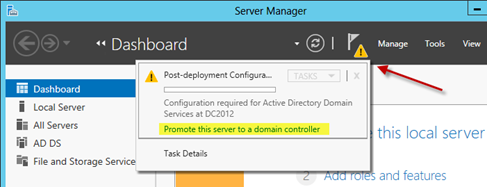
Next time your launch Server Manager. You will see a notification icon. Press the exclamation point. Select Promote this server to a domain controller
“
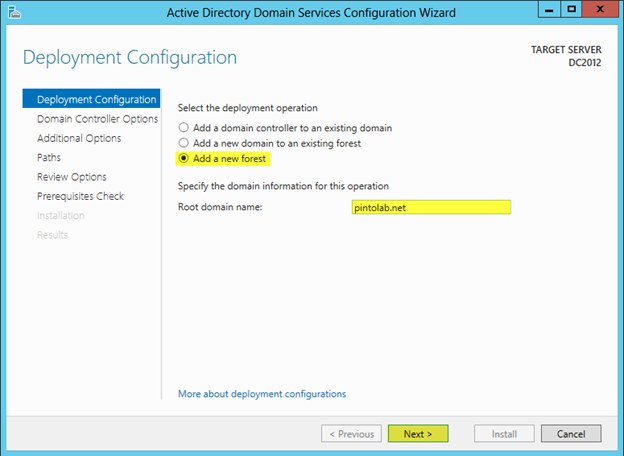
Warning: Do not create new Active Directory forests with the same name as an external DNS name. For example, if your Internet DNS URL is http://contoso.com, you must choose a different name for your internal forest to avoid future compatibility issues. That name should be unique and unlikely for web traffic. For example: corp.contoso.com.
Select Add a new forest
Specify the root domain name, in my case its pintolab.net
Press Next
In my new lab all servers will be Windows Server 2012. So I will be setting the functional level to Windows Server 2012. To understand more about Functional Levels please visit: http://technet.microsoft.com/en-us/library/cc771294.aspx
I will select Domain Name System (DNS), because ADDS needs DNS. This machine will function as the DNS server for the whole forest.
Enter a password for Directory Services Restore Mode (DSRM)
Press Next

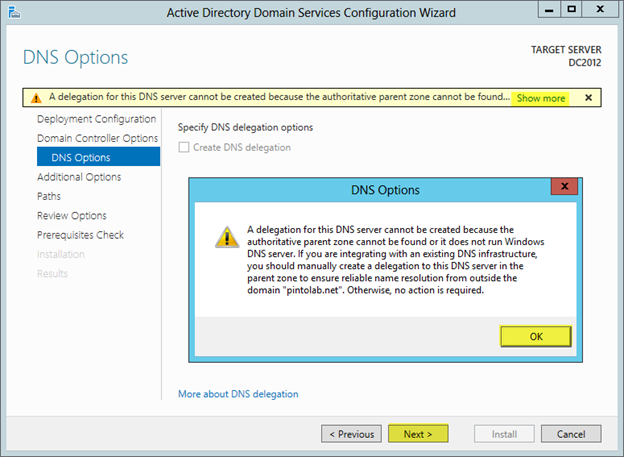
Press Next. If there was an existing DNS server you would be able to change this option.
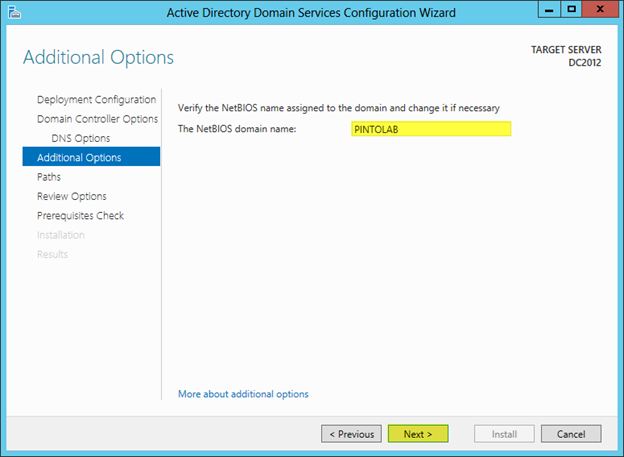
I like to set my domain name to 8 characters or less so that the NetBIOS name is the same as the domain name. If my domain name was longer, it would have truncated it. You can however make this anything you want. More information on NetBIOS Domain Names: http://technet.microsoft.com/en-us/library/cc961556.aspx
Press Next
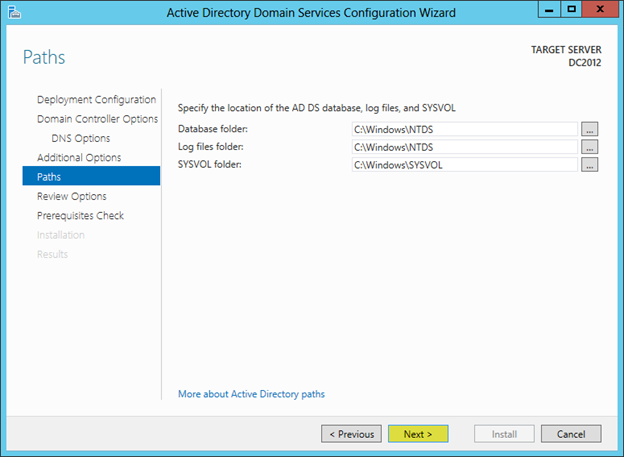
Press Next
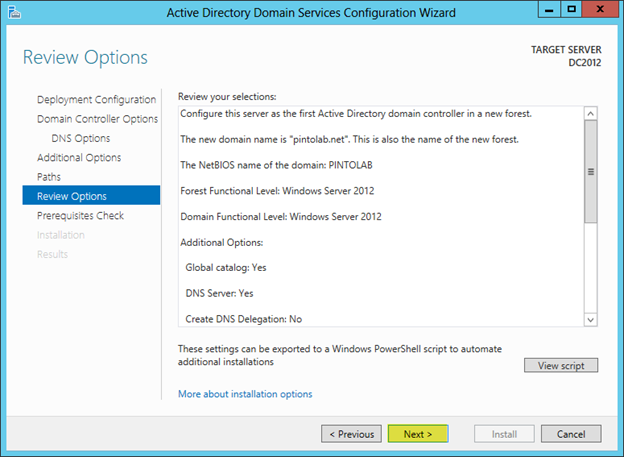
Press Next
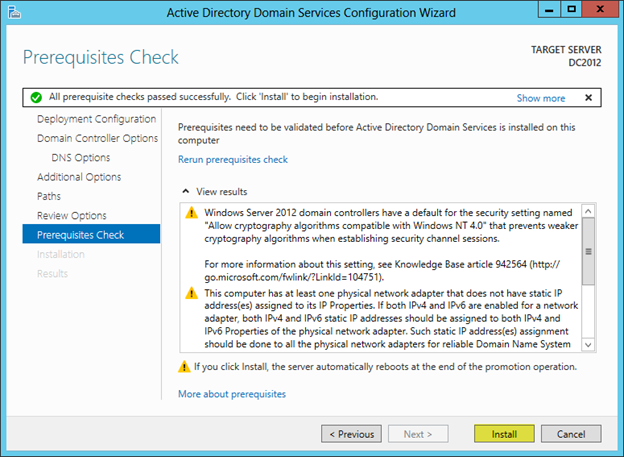
Press Install
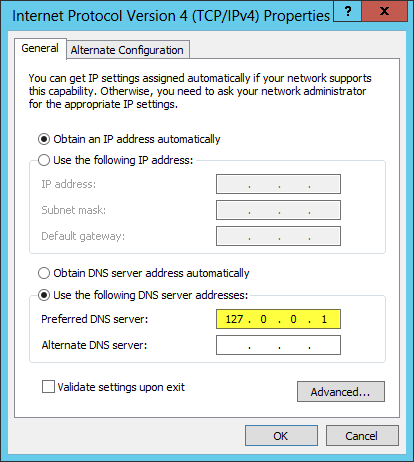
In my case I got a couple of warnings. The most important warning was the one saying I am using DHCP instead of an assigned IP Address. It’s important to make sure your Domain Controller and DNS Servers use static IP’s.
After Installation, Press Close
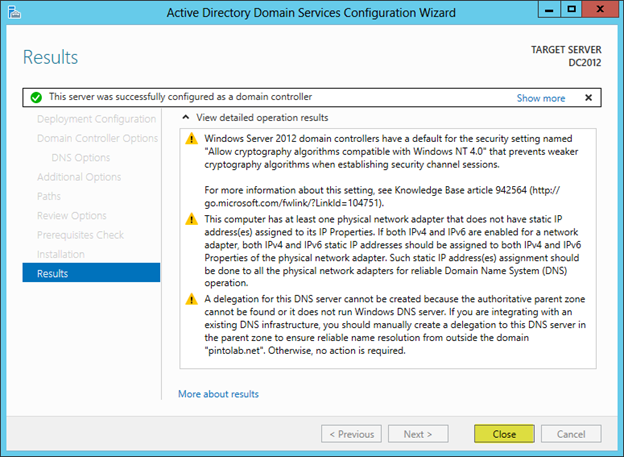
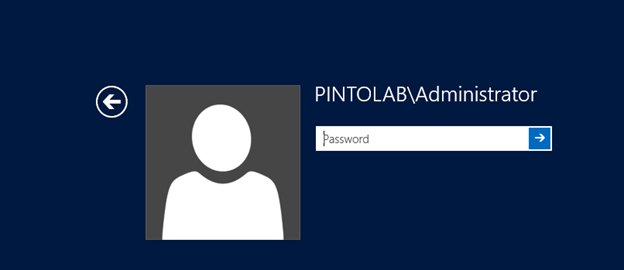
Setup will reboot the server, you will notice that the domain name is now in front of the username
One thing to take note of is that when DNS gets installed it will point the preferred DNS Server to itself and within DNS it will use the DNS Server that was in there before as a forwarder.
“
Managing Active Directory
“
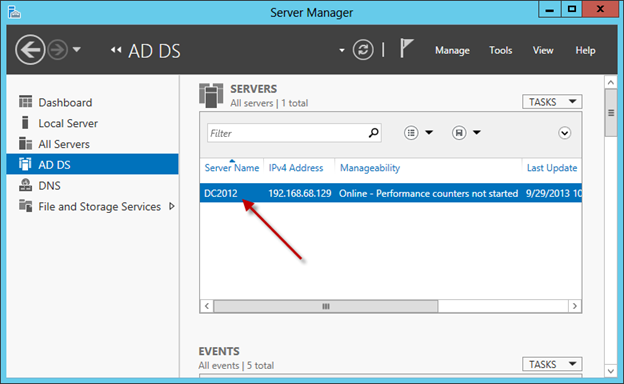
Open Server Manager
Select AD DS
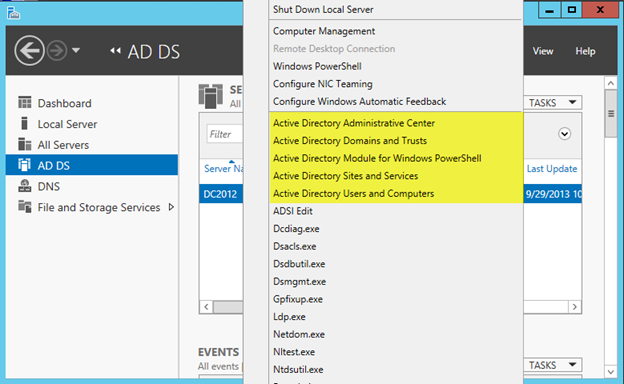
Right Click the Server Name, I find this is the quickest way to get to the Management Tools, since they removed the good ole start menu.
When you right click the server name you should see the familiar AD tools.
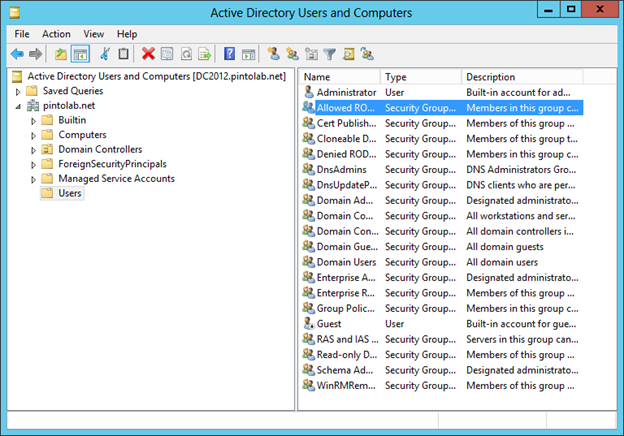
Active Directory Users and Computers thankfully has the same look and feel as previous versions.
“
Additional Resources:
For additional information on installing ADDS please visit the following link: http://technet.microsoft.com/en-us/library/jj574166.aspx
Understanding Domain and Forest Functional Levels: http://technet.microsoft.com/en-us/library/cc771294.aspx
More information on NetBIOS Domain Names: http://technet.microsoft.com/en-us/library/cc961556.aspx
“
“